Friday, May 13, 2011

Gourmet Cupcake Tutorial!

 I've had more questions about my gourmet cupcakes than any other thing I make! So, to answer some of the burning questions, I'll do a little tutorial on them. First, you'll want to make the edible cupcake liners. Melt down a few squares of almond bark and pour it into a squeeze bottle. Almond bark comes in chocolate and white.
 You could also use the colored chocolate bits if you wanted... it comes in a dozen or so colors, and would be really cute! Squeeze a layer of the chocolate into some paper cupcake liners and let them set up in a muffin pan to keep their shape. Once they're hard, carefully peel off the paper and you'll be left with just the chocolate.
 Set the liners aside. Mix up your favorite cake batter, and pour it into both a 9x13 and a 9x9 pan. You'll want the cake thinner than usual. Bake the cake as the directions say, then let it cool completely. Find a round cookie or biscuit cutter that fits snugly into your chocolate liners. Cut out rounds of cake, one for each liner that you've made. Slice each round in half. Put the filling of your choice into a piping bag with a large round tip. For these cupcakes, I used Nutella. (Pretty sure the stuff comes directly from heaven!) Pipe a small amount of filling into the bottom of each liner.
 Place one layer of cake on top of the filling. Pipe more filling on the cake layer, then place the rest of the cake onto the second layer of filling. Now frost the cupcakes as you would any other cupcake. The picture to the right is a cross section of the perfect gourmet cupcake!
 The gourmet cupcakes can easily be altered with different cakes fillings, and frosting. But no matter what you do, they will be super rich with all of the extra chocolate! As always, cake is best made from scratch with quality ingredients, but do what you like, and they'll be good either way!
Well, there you have it! I've divulged my secret! I hope at least a few of you try making gourmet cupcakes. I'd love to hear from you if you do! And for the rest of you, don't worry... not everyone likes to make the putsy stuff like I do! If you fall into the "that's too much work for me" group and the "but those look really good" group, let me know and we can work something out!

Tuesday, May 10, 2011

Butterfly Lessons

I did a big corporate grand opening cake a few months back... (The Keller Williams cake) While there, I ran into an old friend. Ok, so I babysat her ages ago. So what that she's in her 20's, that doesn't make me that old, does it? Anyway, we got to talking and decided that we had to do lunch or something to catch up. She told me that her mom, also a good friend, had volunteered her to make a small cake for a friend of the family who was remarrying her husband after a divorce. Confusing, I know. She'd never make a big cake before, and didn't know where to start.
 I told her she should start at my house! It only had to feed about 30 people, but wedding cakes need to be at least 3 layers right? The wedding theme was going to be butterflies and the colors were blue and purple, otherwise, we could do whatever we wanted! In order to save time, I had the cake baked and a bunch of gum paste butterflies already dried. She only had a few hours away from her busy schedule, so we had to get as much done in a few hours as we could! We mixed some colors, and airbrushed the butterflies. (The airbrush is my favorite toy! And a gift to myself... I'm not ashamed.)
While they were drying, we covered the cakes with fondant and stacked them. We used  food color and edible markers to put some detail on the butterflies, and attached them with royal icing. I'd made some gum paste curly things for the topper too. She drove the cake to the reception site, and it made it there pretty much in tact! It was a ton of fun teaching cake decorating! And it's a great excuse to catch up with old friends!

Monday, May 9, 2011

Cake Pop Tutorial!

 Yesterday I made a bunch of cake pops for a little get-together I'm going to tomorrow night. I had my camera ready and captured the process. So, today, I'd like to let you all in on the secret of cake pops! I used some leftover cake from gourmet cupcakes. (tutorial in a couple of days!) But you can use any baked cake you have.
 First, crumble the cake into a big bowl. We had leftover frosting from the cupcakes too, so we just used that to moisten the cake crumbs. You can use frosting, Nutella, or whatever you have laying around, as long as it gets to a consistency that will get firm when chilled. The mixture should hold together when you squeeze it. Chill the goopy mess, then scooped it out with a little ice cream scoop.
 Roll the portions in your hands to make them round, them put them in the freezer for a few minutes to harden. While the balls are in the freezer, melt a few squares of almond bark in a coffee cup. Take the cake balls out of the freezer and set them on the counter.
 Dip a lolly pop stick into the chocolate and push it into the cake ball. The chocolate sets in about 30 seconds since the cake is chilled. Once the stick is set, it won't fall off so easily when you dip them. Dip the whole cake pop into the chocolate to cover the cake.
 Gently tap the stick on the side of cup to shake off some excess chocolate. If you tap too hard, the whole cake ball will fall into the chocolate! But hey, you get to eat your mistakes, so tap away! Once the extra chocolate is off, you'll want to press the stick into something to hold it upright while it dries.
I used a piece of foam that I had laying around. I got it in the crafting section of Walmart, but you can find them anywhere. If you want to spruce up the cake pops, sprinkle them with your favorite sprinkles before they dry.You're going to want to hide these if you made them for a certain event, they don't last long! I'm looking forward to playing around with different flavors and fillings! Happy baking!

Sunday, May 8, 2011

Cake Burgers!

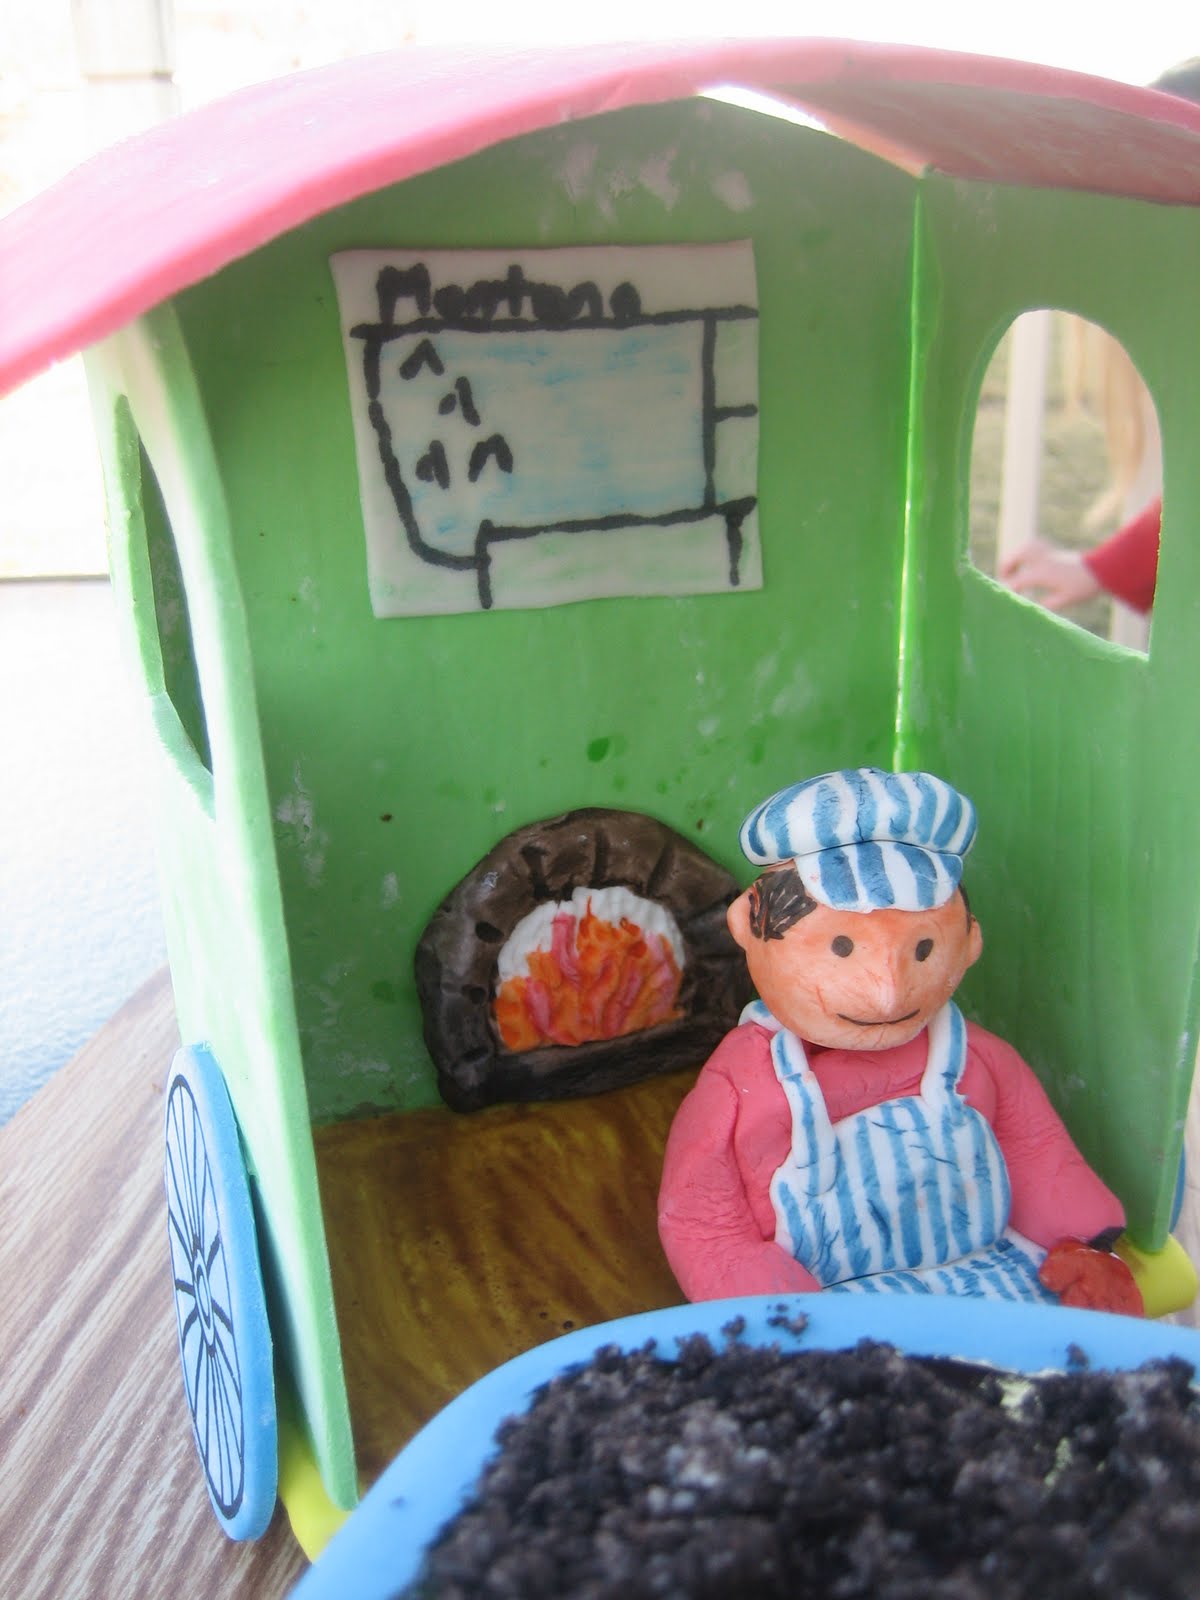
So, it was my dad's birthday a few weeks ago. I won't embarrass him by putting his age online, but let's just say that Moses got a personal invite. We invited the whole family, minus the sister in Canada, to our house for dinner and cake. Since she wasn't able to make it, my sister has been begging me for pictures of the cake! Well, here it is!
 It was relatively warm out for April, which means above freezing here in MN. It was still a bit cold for burgers on the grill, so we did burgers for desert! These are cupcakes made from a heavy butter cake cut in half with a brownie in the middle. We colored frosting to look like ketchup and mustard. Then we added some fondant lettuce and bacon.
 I "toasted" the bun to give it a grilled look. I had a bunch of extra cake batter, so I baked it off and cut it into strips for the fries. I pan fried them in some butter to give them a country fry look and crunch. I have to say, the mustard looked almost too real... It took a few minutes to get used to dipping cake into it!
The kids had a blast with the cake burgers! Between my brother and I, there are five kids five and under! They thought these were so much fun! The only thing I'd do different next time is maybe add a few sesame seeds on the buns!

Saturday, May 7, 2011

White Chocolate Curls!

 I love this cake! This was made a few years ago for a couple of friends from church that were tying the knot! They were very open to whatever I wanted to do. I love when that happens! They had this little cake for pictures and cutting, and had cake plates that they made at each table with cupcakes for the guests. the cake plates were super cute. I wish I had a picture of them to show you! They went to a thrift store and got a bunch of different clear plates and goblets. They glued the plates on top of the upside down goblets. No two cake stands were the same.
 Anyway, back to the cake! It's a two tier cake with 6 and 8 inch tiers. It's frosted with buttercream, and covered in white chocolate curls. The top picture got taken after it got bumped around a little, but you get the idea! I love how soft it looks from far away, and the close up of the curls just looks cool!

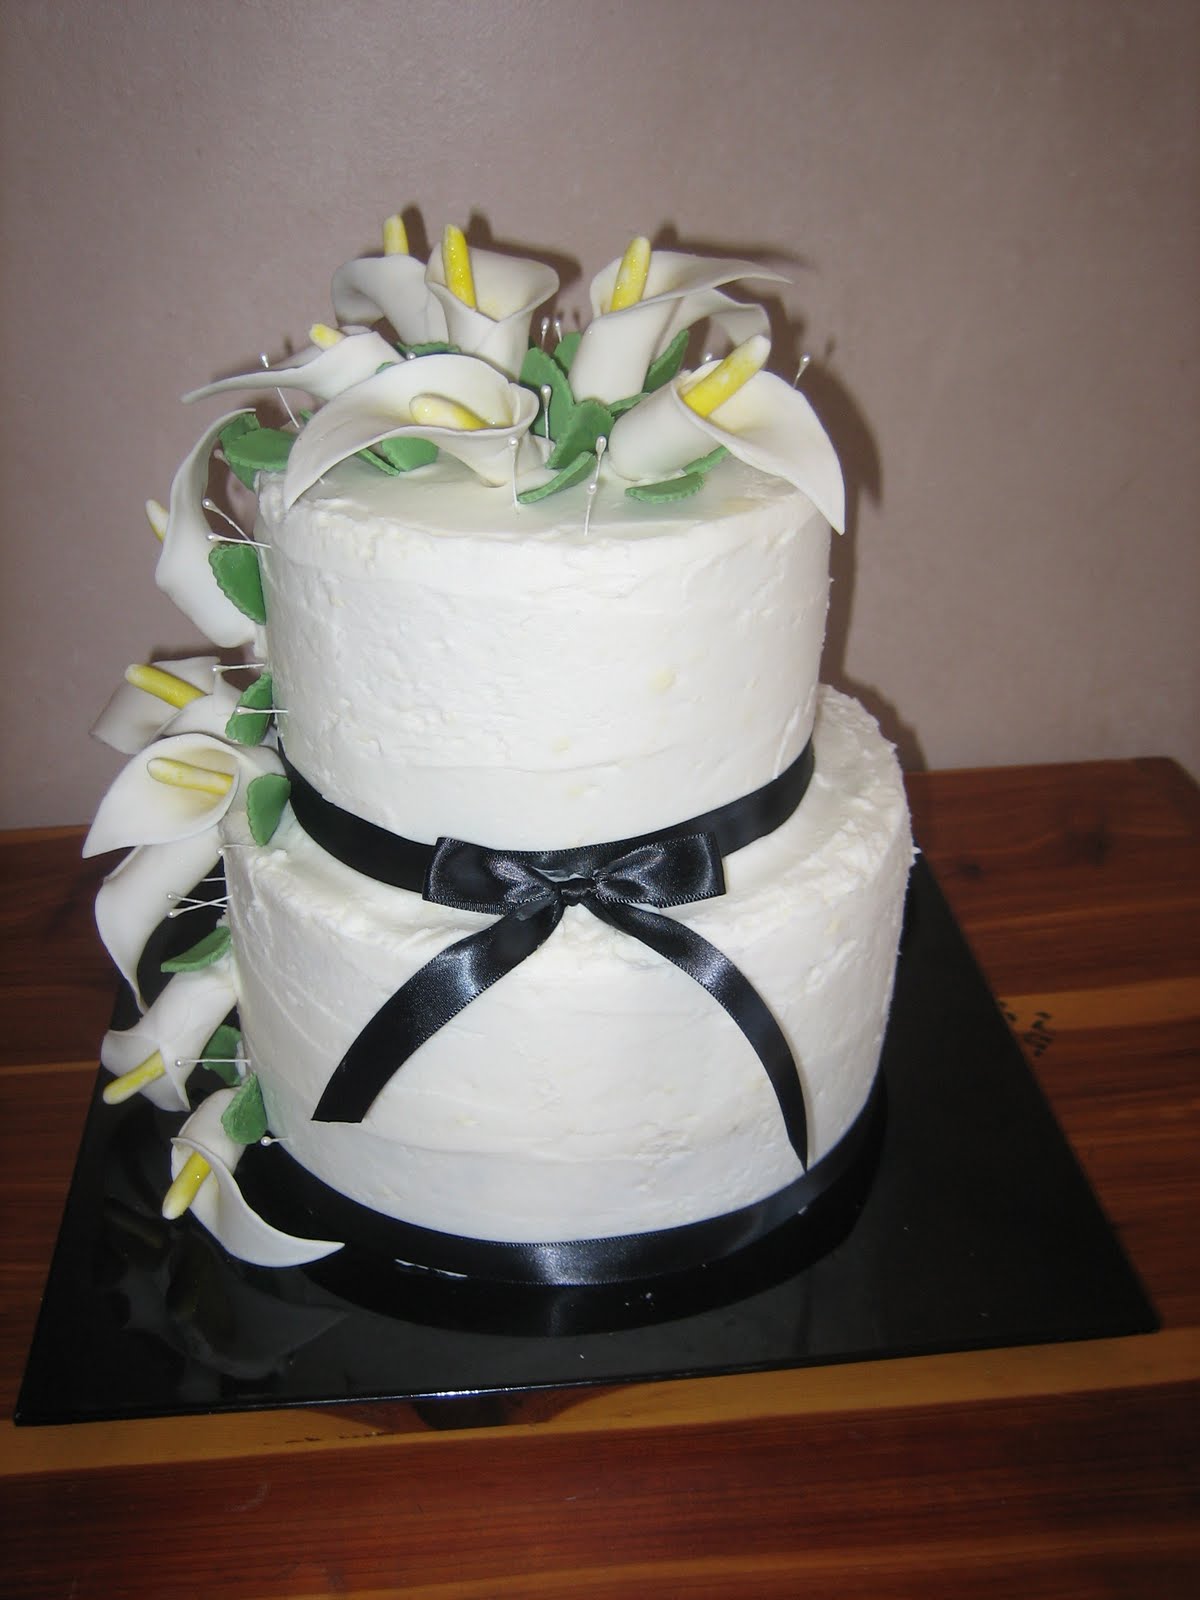
This is also the wedding where I told them that it wouldn't be a problem to make edible chocolate cupcake liners... I'm actually making a bunch this weekend, I'll think about doing a little tutorial!

By the way, the wedding season is coming up... I'd love to book a few more weddings if you have one coming up! Graduations open houses are also the perfect place for a cake!

Sunday, May 1, 2011

Long Distance Calla Lillies

 Everyone has friends... Good friends, not so good friends, and people in the cubicle next to you that barely qualify. But everyone has those very few special people that outshine everyone else in your buddy list. You know, the friend who you haven't seen in years, but when you finally get together, it seems like no time has passed at all.
 I'm lucky enough to have a number of these friends. As time passed, and we all got older, my forever friends have been spread all across the country. One of them had it rough for a few years, and entered the Marines to figure out his life. After serving in the front lines in Iraq, and losing close friends in combat, he moved to Texas to get away from life and figure out what to do next. It was during this time that I got a call. He wanted to know how long it took for me to make a cake.
 It was his parent's anniversary in a few days, and he wasn't going to be able to make it back to Minnesota for the party. I promised him that it wouldn't be a problem. I was making a cake for someone else at the moment anyway, and had extra batter that I didn't know what to do with. He got lucky, cuz he only gave me two days! I threw this cake together with no time to spare. It was a butter white cake with homemade raspberry filling. The calla lilies were left over from a previous cake I'd done, and I always have extra leaves laying around. The calla lilies were made of gum paste, and were formed around those little sponge rollers that every girl hated as a kid. (New ones, of course)
So, I got the cake thrown together, and posted the pictures on Facebook so he could see it and know what he was giving his parents. We planned for his sister to come get the cake because I had to work and couldn't deliver it. His parents were completely surprised! They weren't expecting much more than a phone call. From what I hear, his mom still talks about it. I'm sure she talks more about the fact that he arranged the surprise than the fact that I made it, but still. It was so much fun to be a part of it!

My friend now lives very near where my husband grew up, so we still get together from time to time. Life has changed for both of us over the years. We now do double dates and talk about my kids, but he will always be one of those friends I'll care about forever.

Monday, April 25, 2011

Bumpa's Choochoo

 I did this cake a few years ago for my dad's birthday. Like I've said before, for some reason, I always seem to have time to do a fun cake for his birthday.

My dad has a thing with trains. Growing up, we had a false wall in the basement that folded down into a model train scene.
  I have no idea how many trains there are, but I'm still not allowed to touch some of them. There are boxes and boxes of trains and train related things. In the basement of my parent's current house, there is a track that goes around the ceiling with trains that make noise and steam.

My kids picked the design for this cake. They call him Bumpa, so that's why it says "Bumpa's Express" on it! We made Bumpa out of fondant and had him sitting in his train. We made a little map of Montana for the cab, and a fire stove for the coal. The coal in the coal car is crushed Oreos.

 I built up the train so it would look like the wheels were holding it above the ground.

I know the colors are kind of childish for a grandpa, but how fun would it be with baby animals poking their heads out for a baby shower!?